I posted a comment on Facebook a while back that I was making homemade yogurt. I received many replies asking what recipe I used? How did I make it? Was it good? So to answer all these questions,I thought I would describe my process here.
The recipe I use is a very basic and common one. It can be found all over the internet so there is nothing new here. First, you will need to collect your ingredients. You need:
- 4 Cups of Milk
- 1/2 Cup Instant non-fat dry milk powder
- 1/2 Cup Plain Yogurt (With live Cultures!)
OK. Thats it! I do want to mention here that the starter yogurt must be from either an earlier batch or store bought and has “Made with live cultures” on the label Other wise, you will just end up with soupy milk.
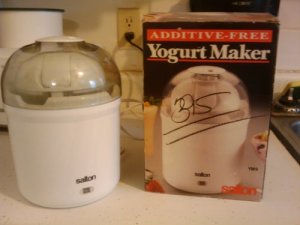
Now for the process. Personally, I have a yogurt maker. If you do not have one, don’t worry. Before I bought my yogurt maker, I made yogurt in a wide mouth thermos. Once it was in the thermos, I wrapped it in towels and put it in a coleman cooler for 8 hours. The trick here is to keep the mix at 80-100 degrees for 8 hours.
One thing that you want to keep in mind is to keep everything clean! Always make sure to wash everything before starting the process. Here is the equipment that I use:
- Yogurt Maker or Thermos
- Double Boiler
- Measuring cups
- Mixing Spoon / Wisk
- Thermometer
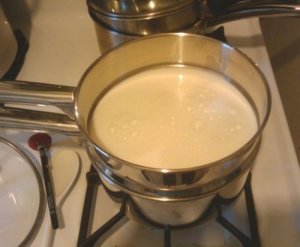
OK. The first thing we want to do is measure out the milk and pour it into the double boiler.
Add the 1/2 Cup of powdered milk. I can hear you already, “Yuk!”. Well, believe it or not, this step makes the finished product creamier. You don’t have to add it but you will be glad you did!
Now you want to heat the milk. This is where a double boiler comes in to play. It makes heating sauces and liquids very easy and safe.
The next step is left out of a lot of recipes. Like beer wort, I heat my “Yogurt wort” to 180 degrees. This step ensures that you don’t have any of the bad yeast beasties spoil your hard work. You can tell when it is getting close to that because a skin will start to form over the milk. You don’t want to boil it!
I know it is hard to see but the thermometer says 180 degrees. Be careful during the heating process and stir often. Steam escaping from the sides of the double boiler can burn you. Use and oven mit or a clip on thermometer.
Now it is time to cool the milk. Whats that you say? Cool it? Yes, the little beasties in the starter yogurt need a nice comfortable temperature to do their job. (Just like brewing beer!) I cool mine to 100 degrees. This makes a nice climate for them and I haven’t had a batch go bad yet! (Knock on wood) A rapid way to cool your mix is to set the pot in a sink of cold water. Shouldn’t take longer than 5 minutes to be at temperature.
After a few minutes, use your thermometer to check the temperature. Remember to clean your thermometer after every temperature check. (Remember that cleanliness statement above!)
Now it is time to add your starter yogurt. Starter yogurt can be from a previous batch that you made or bought from the store. I normally just buy a small container because I usually have none of my homemade left. Stir in the yogurt until it is mixed in and not lumpy.
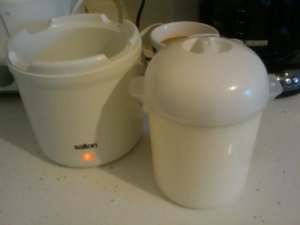
Once you have it all mixed in, transfer the mix to your yogurt maker or to your thermos. If your using a thermos, you want to work quickly so you do not lose any of the heat! If using a yogurt maker, make sure you preheat it.
And now you wait. Yogurt takes about 8 to 10 hours to process. My particular yogurt maker makes it perfectly in 8 hours. They even put a number dial on the top so you can remember when to take it out. If the finished yogurt is too tart, try shortening the time. I like mine with a little tartness but everyone has different tastes.
After 8 to 10 hours you should end up with a semi solid white mass also known as yogurt! There may be some clear liquid on the top. This is the Whey. This is a by product of the process. I normally just stir it back into the yogurt. (It is good for you!)
Once it is finished, put the yogurt in the refrigerator too cool. It will thicken also. After the yogurt has cooled, it is ready to eat. I prefer to eat mine with a handful of granola but you can add whatever you like.
Hope you get some use out of this. Maybe next time it won’t take me a year to enter a blog post. Enjoy!


